Adding an NFS Volume to Proxmox from a Synology NAS
When provisioning VMs in Proxmox using Terraform, especially when dealing with cloud-init and custom user data, having a compatible storage backend is essential. Proxmox requires a storage volume that supports the snippets content type, which is not supported by LVM-thin storage. One of the best options for this is using an NFS share from a NAS device. In my setup, I used a Synology NAS and created an NFS-mounted volume named synology-lab in Proxmox. Here’s how I got it working.
Step 1: Create the Shared Folder on Synology
On your Synology NAS, begin by creating a shared folder that will be used for Proxmox storage. In my case, I named the folder Lab. You can do this via the Control Panel → Shared Folder section on your Synology interface.
Once the folder is created, go to Control Panel → File Services → NFS and enable NFS support.
Step 2: Set Up NFS Permissions for Proxmox
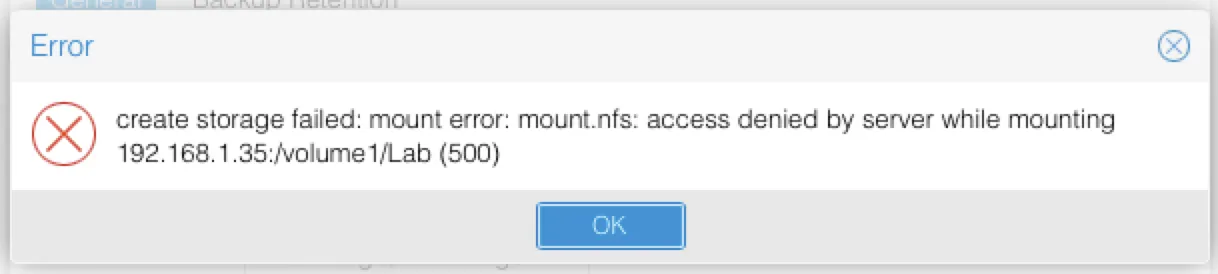
Initially, I tried to add the NFS volume in Proxmox directly, expecting it to “just work.” However, I ran into a permissions error during the mount process. Proxmox could not access the shared folder on the NAS.
My first thought was that perhaps I needed to create a service account on the Synology NAS specifically for Proxmox. However, after further investigation, I found that wasn’t necessary.
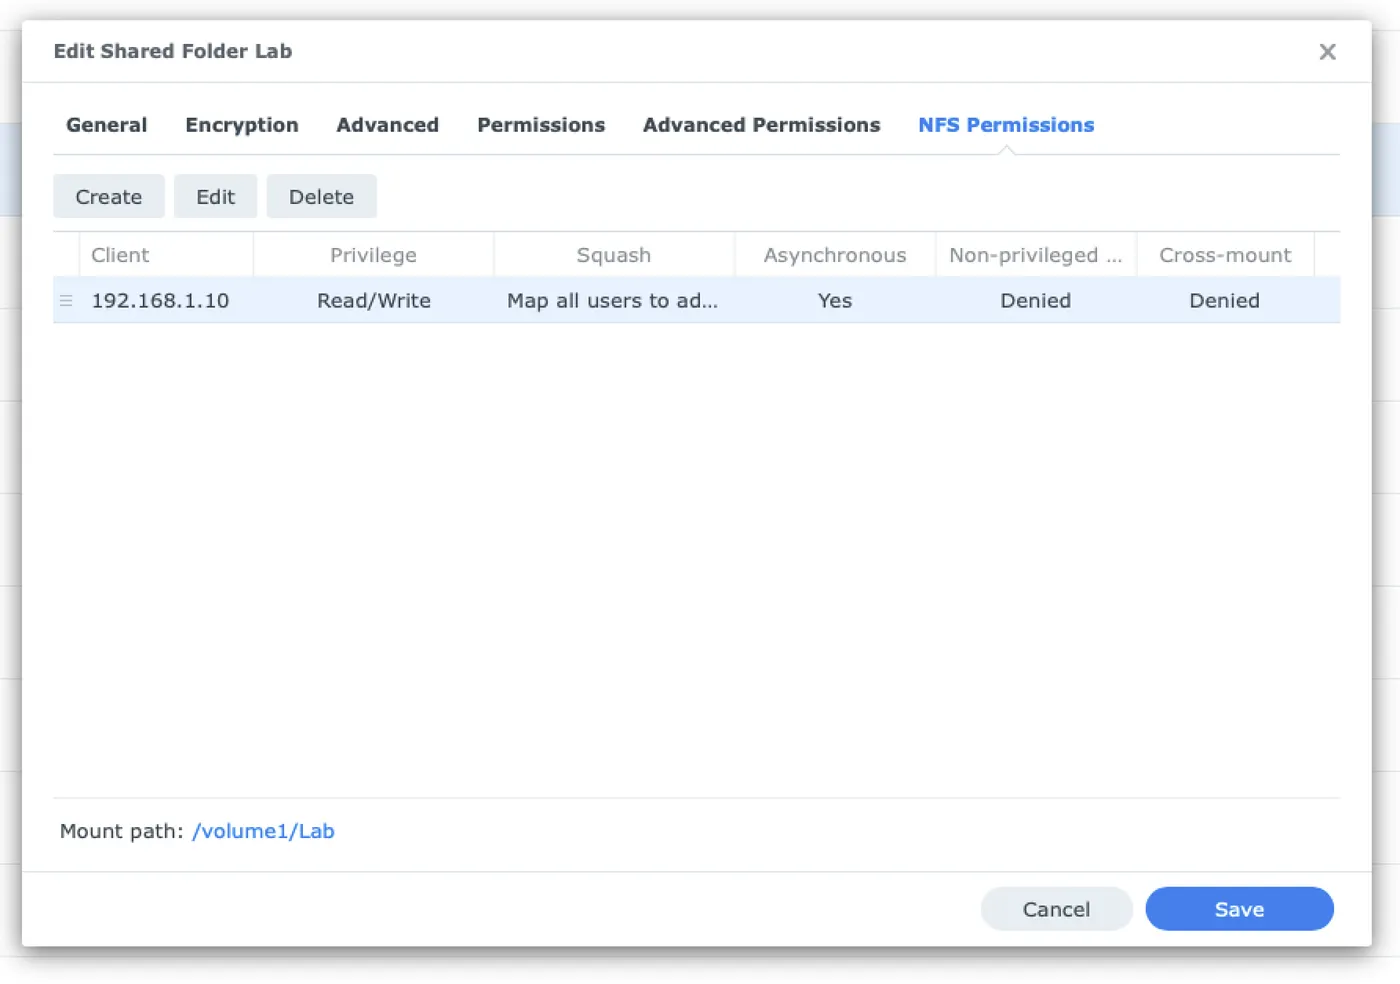
The real solution was to grant NFS access to the Proxmox server by IP from within the Synology settings:
- Go to Control Panel → Shared Folder → Lab → Edit → NFS Permissions.
- Click Create and enter the IP address of your Proxmox server.
- Set the privilege to Read/Write.
- Enable Squash settings as needed (e.g., map all users to admin).
- Confirm and apply the settings.
Once permissions were properly granted, Proxmox was able to access the NFS share without issue.
Step 3: Add the NFS Volume in Proxmox
Now that permissions were in place, I returned to the Proxmox web interface:
- Select Datacenter from the top of the sidebar.
- Go to Storage.
- Click Add → NFS.
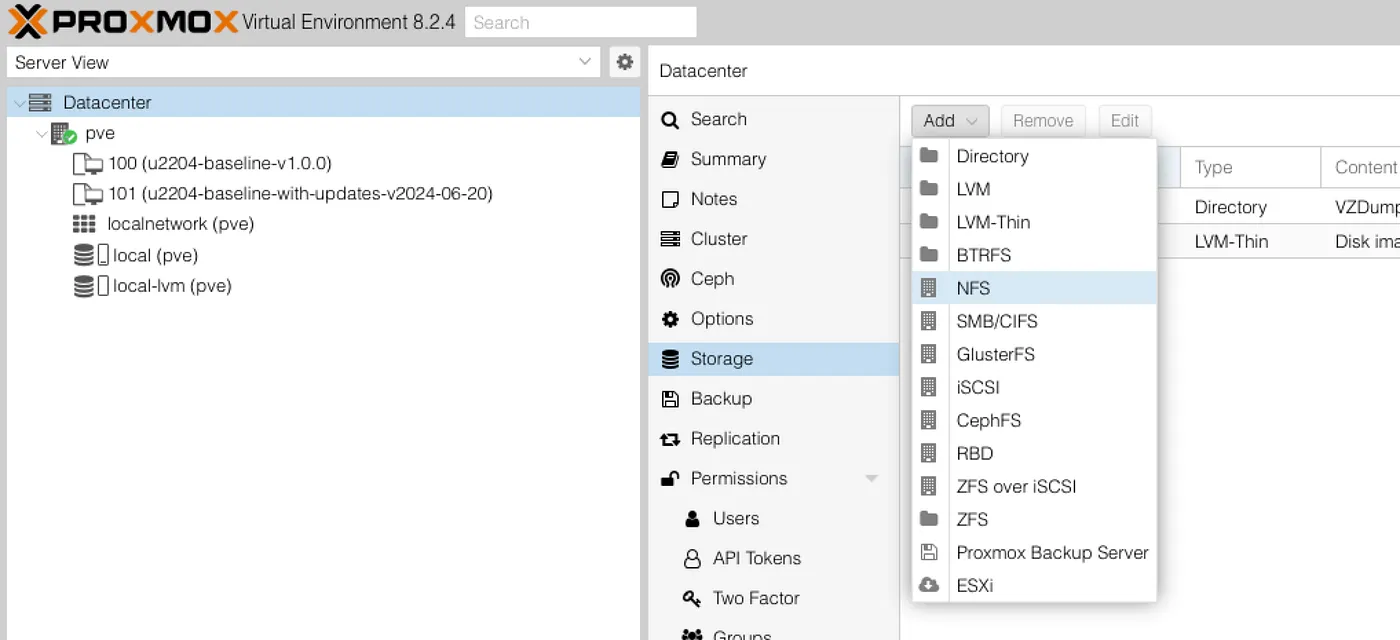
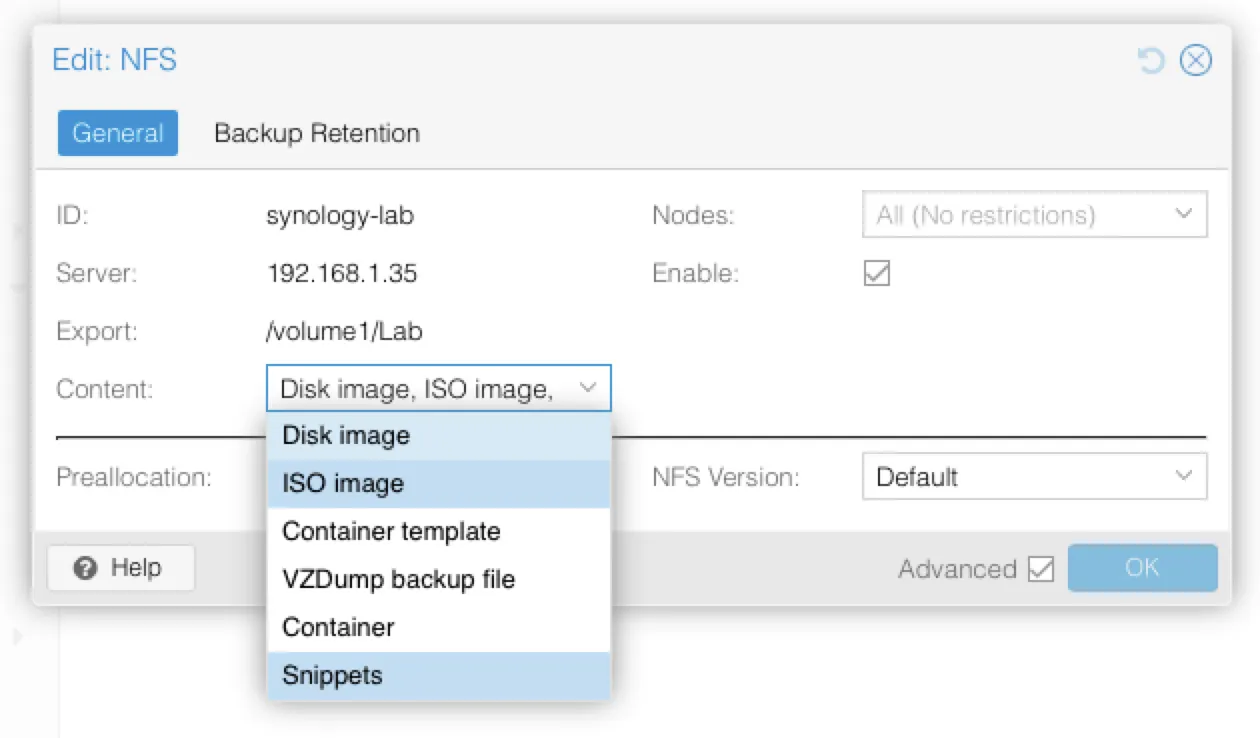
- In the dialog that appears, enter the following:
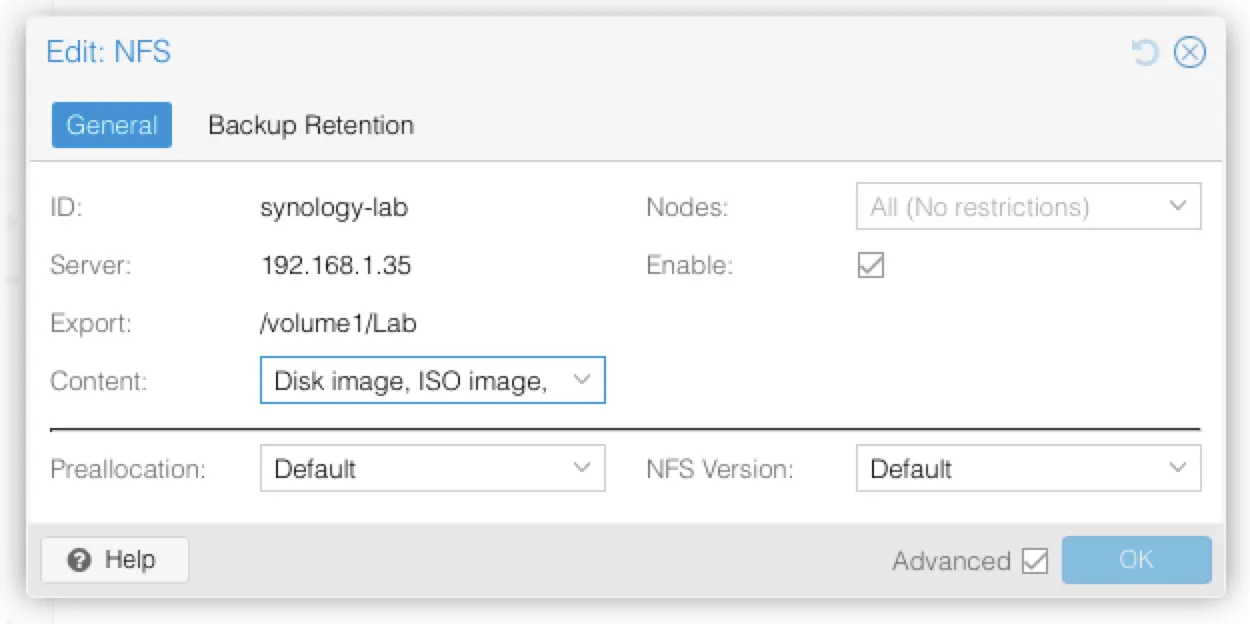
- ID: A name for the storage, e.g., synology-lab
- Server: The IP address of your Synology NAS
- Export: /volume1/Lab (or whatever the path to your shared folder is)
- Content: Make sure to include Snippets among the supported content types
- Nodes: Select the Proxmox node(s) that should access the share
Once configured, click Add.
If you skipped Step #2 then you will run into this error message:
Once you’re done you’ll see the NFS volume in your Storage pane:

Step 4: Enable Snippet Support
The key reason for this setup is to support snippets—a required content type when using cloud-init or other Terraform-driven file-based provisioning. LVM-thin volumes do not support snippets, which is why using a file-based backend like NFS is necessary.
During the “Add NFS” step above, ensure Snippets is checked under the Content section. If you forget this step, you can always edit the storage settings afterward and enable it.
Conclusion
Adding an NFS volume to Proxmox using a Synology NAS is straightforward once NFS permissions are properly configured. While Proxmox doesn’t require a dedicated service account on the NAS, it does require explicit access to the shared folder via IP. Once access is granted and the NFS volume is mounted, enabling snippet support allows you to use it with Terraform resources like proxmox_virtual_environment_file, unlocking powerful automation workflows for VM provisioning. With this setup complete, you’re ready to move on to deploying VMs with cloud-init and Terraform using your Proxmox environment.